Railcar Structural Testing Case Study
Obvious signs of fatigue — cracks at the corners of doors — had begun to surface on an in-service Railcar. A railcar structural testing case study.
The Civil/Infrastructure category contains blogs related to civil engineering and infrastructure projects.
Obvious signs of fatigue — cracks at the corners of doors — had begun to surface on an in-service Railcar. A railcar structural testing case study.

Whether manufacturing vehicles, mining natural resources or operating machinery on a construction site, a single common factor can bring your operation and productivity to an absolute halt.
That factor is noise.
In a world where precision and performance rule, measuring and controlling sound levels can be crucial to the success of your product or project. The team at Integrated Test & Measurement (ITM) have developed a customized solution that not only measures and collects sound-level data, but will help your team identify the specific components causing all that noise.
On-Site Sound Testing Capabilities
ITM can assist with all types of sound testing on site including:
In each of these instances, their engineers will be packing a custom Sound Level Test Kit full of data acquisition hardware, microphones and more. The key to their equipment, however, is that each kit includes ITM’s proprietary iTestSystem software, an intuitive sound-level human machine interface (HMI) that allows for sound-level recording and reporting.
Mark Yeager, ITM Lead Programmer, says building the capability within iTestSystem to measure microphone data now allows customers to look at a real-time display of sound-level measurements.
Yeager says their crew can build out tests on site to do such things as measure pass-by noise, a process by which the team arranges mics inside a vehicle and along both sides of a 40-yard stretch then capture, monitor and analyze a vehicle’s sound and compare it to acceptable standards. By breaking apart the frequencies of components, they can even zero in on trouble spots such as a turbocharger on a car or a loud cooling fan on a piece of construction equipment.
Measuring Dangerous Sound
Yeager also points out the need to measure sound in places like construction sites or mines, where there may be concern over hearing loss for operators. According to the Centers for Disease Control, hearing loss can result from a single loud sound (like firecrackers) near your ear. Or, more often, hearing loss can result over time from damage caused by repeated exposures to loud sounds. The louder the sound, the shorter the amount of time it takes for hearing loss to occur. Sound is measured in decibels (dB). A whisper is about 30 dB, normal conversation is about 60 dB, and a motorcycle engine running is about 95 dB. The CDC advises that noise above 70 dB over a prolonged period of time may start to damage your hearing, and loud noise above 120 dB can cause immediate harm to your ears.
Test-Ready Sound Level Kits
If you have test engineers on-site and simply need the equipment to help you get to the bottom of your sound issues, ITM will ship their test-ready kit that includes a pair of pelican carrying cases packed with the following components:
Whether your needs include on-site sound testing and analysis or you simply need the crucial equipment to measure sound and vibration levels yourself, ITM can help.
ITM is a structural test & measurement engineering service and software company located in Milford, Ohio, that helps companies reduce costs and improve efficiencies in their product development, manufacturing, and production activities. ITM is a recognized NI Gold Alliance Partner that provides software development, structural and mechanical testing services, industrial monitoring, strain gauging, and data analysis solutions to clients around the globe.
For more information about sound and noise level testing or our sound level test system or other data collection solutions, contact Ryan Welker via email at ryan.welker@itestsystem.com or phone at (844) 837-8797 x702.
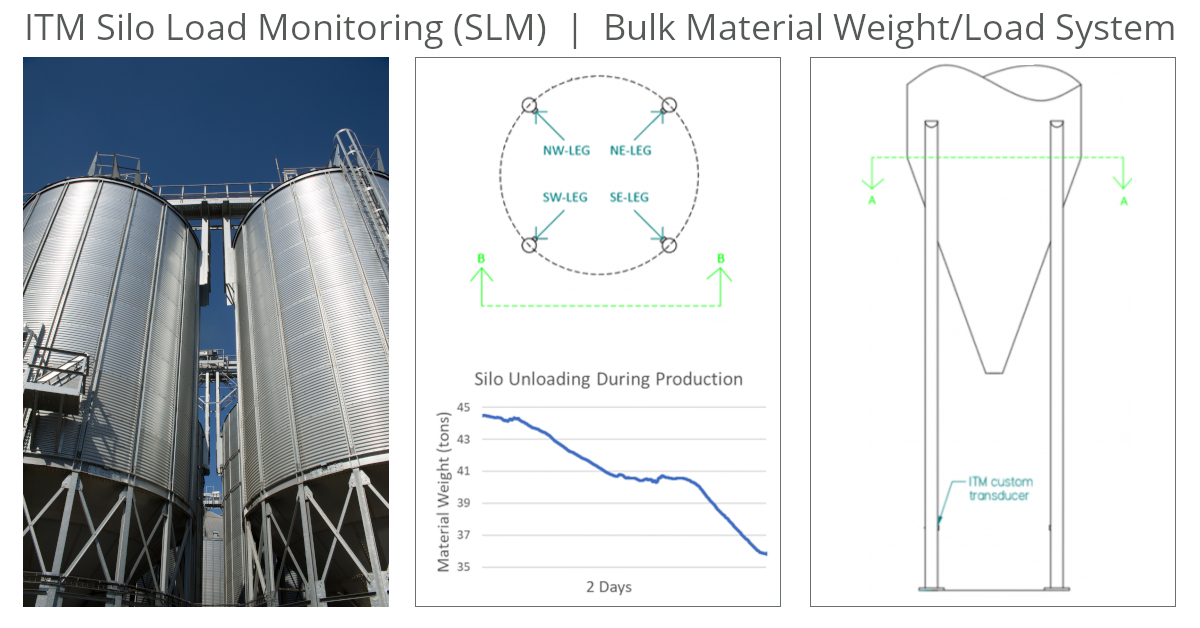
Plant operators need to continuously measure bulk material levels/weight in their silos and hoppers to ensure their processes are running safely, efficiently, and without bottlenecks. Measuring these levels allows operators to automate vessel filling, verify material consumption, and prevent overfilling.
ITM provides its customers with a variety of structural load monitoring systems. Using strain gauge based transducer technology, ITM can design and implement a real-time system to continually monitor load responses of the supporting members on an array of structures.
Strain gauge based measurements are more accurate and typically less expensive than load cell retrofitting. The addition of a monitoring system can also reduce the risks associated with manual measurements including contamination of product and, more importantly, injury to a worker.
The two ways to measure bulk material quantity in silos/hoppers are level indicators (laser, ultrasonic, radar) and weight measurements (load cells, strain gauges). Weight measurements are more accurate, safer to install, and can be installed during operation. Of the types of weight measurements, ITM prefers to implement strain gauge-based solutions since they do not require structural modification of the vessel.
An ITM silo monitoring system typically consists of weatherproofed strain gauges for each silo leg and a NI CompactRIO embedded controller to acquire data, process signals, and output results. Systems are scalable to accommodate all the silos at the plant.
The graph above shows a typical trend of real silo data during unloading. Weight levels are sent directly to factory DCS systems and historians via common communication protocols like Ethernet/ip and Modbus, or they can be viewed on the system’s webpage or a local/remote workstations and panels.
Most bulk material storage is outside, so temperature and other environmental factors must be accounted for not only in the durability of the equipment, but in the sensor design and data processing. Changes in temperature, wind, and humidity can result in changes to the load path in silo legs. Load changes are account for by instrumenting all or most of the silo legs and selecting the appropriate strain gauge bridge design which results in continuously accurate weight measurements.
While other systems require calibrating the system with known loads (point calibration), ITM calibrates the system using a shunt voltage across the strain gauge bridge. This process automatically calibrates the system and eliminates the requirement of having pre-known material weight added to the vessel.
For more information about silo monitoring, contact Ryan Matthews @ 1.844.837.8797 x706. To see how ITM’s structural load monitoring systems work watch this video below.
A case study describing a strain gauge DAQ system used to validate several new designs of a heavy lift lattice boom crane to comply with SAE J987 standards.
A case study describing a reliable system for testing generator vibration levels after production in order to verify proper unit design and assembly.
Finding efficiency improvements and uncovering hidden unsafe conditions in a process can prevent injury and save your company millions.

Sang-Soo Kim is used to overcoming bumps in the road. After all, his career is centered on developing technology that improves pavement conditions.
The Ohio University researcher and civil engineering associate professor was facing a fast-approaching deadline to prove his novel asphalt testing device was worthy of startup funding from the state of Ohio when he turned to Integrated Test & Measurement (ITM) for help.
The preeminent researcher had a challenge for Chase Petzinger, ITM software engineer. His scratch-built device — essentially an extreme oven/freezer combo that heats or freezes pucks of asphalt material to force expansion or contraction — needed complex hardware and a custom software solution to control signals from the device and ultimately record asphalt cracking data.
“I was extremely happy and impressed with ITM’s technical skills,” said Kim. “I was on a very tight schedule to finish the project in time, and they were very flexible and accommodating to my needs.”
The job required ITM’s team to develop software to record data from National Instruments hardware as well as control and monitor a custom built Watlow Programmable Logic Controller. In addition, the team had to design and build an enclosure that held all the data acquisition equipment and did all the power-cable management signal conditioning.
“So he had the oven shipped to us, and then he showed up with a big box of all the stuff that he had brought,” recalls Petzinger. “He set it down and said, ‘Okay, make this work.’”
Specific sensors and fixtures included GT1000RA LVDT Sensors, NTC-6000 signal conditioners, RDP S7AC signal conditioners and custom-built stainless-steel fixtures. In addition, the data acquisition process required employing a NI cDAQ-9174 Chassis, NI-9216 RTD modules as well as an NI-9209 Voltage Module.
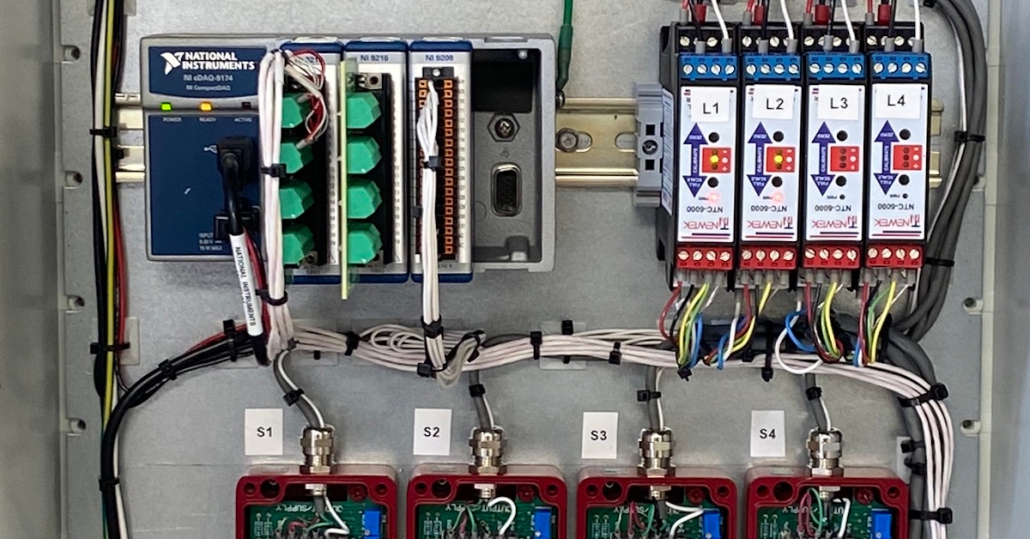
Petzinger explained that he was able to customize the software application using LabVIEW to both collect the data from the sensors inside the oven as well as directly communicate with the device to control start and stop functions as well as the temperature inside.
“I think there were about 50,000 rows in this Excel document of different commands and ways that I could talk to the device,” said Petzinger. “I had to figure out how to use that information and then start from scratch writing a program that would send the commands that the oven could actually interpret.”
Petzinger considers these types of automation and data logging applications a melding of both science and art.
“We were able to create an application to communicate with a unique piece of hardware that we had never seen before,” he said. “if you have your own proprietary oven or switch or machine or something, we’ve worked with unique applications before, and we can do it again.”
Thanks to ITM, Kim not only was able to present his device to the Ohio Department of Development, but it outperformed even his own expectations.
“We wanted to demonstrate this testing device is indeed able to predict low-temperature performance,” he said. “We ran the test with the device that ITM made, and we had one of the best correlations I’ve seen in an asphalt pavement study.” Kim says ITM helped him prove that his device can predict which mixtures of asphalt will crack more accurately than existing tests. And, importantly, it will yield results in a single day where traditional asphalt studies take a week or longer. Next up in his effort to commercialize the unit, Kim intends to publish the results of his work in industry publications, and he’s already seeking a patent.
For more information about this project or other LabVIEW development projects contact Mark Yeager @ (844) 837-8797 x701

If the COVID-19 pandemic has proven anything, it is that we live in a business climate where efficiency and accuracy have never been more important. In other words, none of us can afford to make costly mistakes.
With that in mind, I’d like to share some tips for you to consider when it comes to this important question: How Do You Estimate Test Engineering Services Costs?
For engineers, testing engineers and managers who find themselves estimating jobs, getting this step right will prove crucial not only to the success of your projects and bottom line, but also to the trust you build with your clients.
The most important requirement is to properly define the project scope of work. This will not only help you determine the necessary hardware, software, and resources required, but it will also help you identify the customer’s expectations and project deliverables. Properly defining the scope of work will help eliminate or minimize overall project time, as it will prevent delays both during the preparation phase and testing phases. Defining the scope of work will require a deep-dive discussion with your client to fully understand their challenges and goals. Remember not to leave vague language in your proposals. In other words, be sure to define who is responsible to provide all that will be needed to fulfill the project. Without a clear definition of the requirements and deliverables, it leaves a lot open for misinterpretation and expectations.
With a properly defined scope, we next must determine what, if any, materials we need to procure. These include sensors, DAQ hardware and other installation supplies. Don’t forget to include the amount of time that will be required to prepare all the materials and hardware. Think through such things as what it will take to package the DAQ hardware for any special environmental requirements. Also, be sure to consider the time it will take you to set up the software configuration file and test all the hardware and sensors prior to deployment.
We also need to consider the onsite testing requirements and location specifics. Costs can mount quickly to cover general travel and living expenses, particularly when the job will take your team to remote places for extended periods of time. You need to think about daily commutes to and from the facility as well as the cost variance for different geographic locations. Flights, vehicles, hotels and meals are crucial to estimate as accurately as possible, and that’s going to take extra research on your part. Keep in mind that travel costs are NOT one-size-fits-all.
Some projects require analysis support and some do not. It all depends on the customers’ resources and requirements. We serve customers by providing raw data files and allow them to perform their own analysis, but we also have experience providing a complete turnkey solution including data analysis. This requirement obviously needs to be defined up front in order to accurately estimate the opportunity.
You need to consider everything when estimating a project, and this commonly involves “access to the instrumentation areas” for our projects. We typically work on large, complex equipment that sometimes require additional tools and resources to access the sensor locations. This could include manlifts, scissor lifts, cranes, rope access and scaffolding. Since the equipment is quite large, you need to think about the amount of signal cable required and evaluate that against deploying a network of DAQ chassis which may be a cheaper solution than routing all sensors back to a single DAQ system. It will also be key to build in language and costs in your estimates to address unforeseen delays. For example, include factors that lie outside of your team’s control — resources not being available, no access to equipment, or even poorly performing equipment that will not allow your team to record good data.
Sensor installation can vary from a couple minutes to a couple hours depending on the application. The same is true of strain gauges. Depending on the testing environment, strain gauges can be installed quickly or become an arduous task. Some applications involve very high temperature and moisture concerns and may also need to survive for long periods of time, which may require a more robust epoxy that requires a heat cure before data can be recorded from the strain gauges. Some applications involve no environmental concern and are only needed for a very short duration. In these cases, the gauges can be installed quickly after surface prep using an industrial type fast curing epoxy. Similarly, some applications may benefit from using weldable gauges that can simply be tack welded to the specimen. This eliminates any challenges and reduces installation time by using special epoxies. These are typically much more expensive, so you must evaluate the economics of this option. In either case, the surface must be properly prepped (ground, sanded, polished) to the base material to ensure a good bond to the test piece.
Our labor rates vary by skill level. Senior engineering and programming labor, for example, costs more per hour than our regular engineering and programming labor. Similarly, sending a senior technician will cost more per hour than a technician. Finally, as is common, materials and expenses are estimated at cost plus 10%. Labor Rates Link
For more information about our testing services, contact Ryan Welker @ (844) 837-8797 x702.
Ryan Welker is a 25-year veteran in engineering, procurement and project management. Ryan currently serves as a Vice President of Operations at Integrated Test and Measurement (ITM) in Milford, Ohio. In this role, he oversees the daily operations and monitors all phases of project fulfillment, including customer inquiries, proposal development, scheduling and manpower, employee training, on-site installations, customer follow-up, and support.
Recent News: Ohio University Asphalt Cracking Prediction System Project
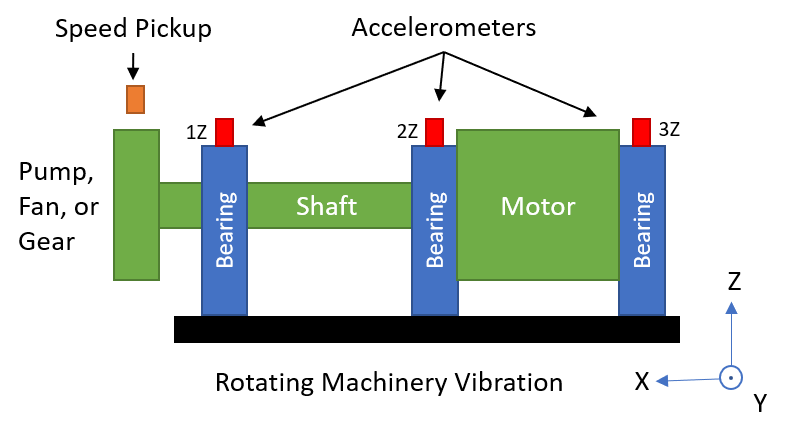
Choosing an accelerometer for rotating machinery vibration measurements can be a daunting task since there are so many options available. This blog outlines the characteristics you should consider when choosing a piezoelectric single axis accelerometer for general purpose vibration measurements and presents some accelerometers to consider.
When measuring vibration on rotating equipment such as motors, pumps, and generators, the most common measurement location(s) are on the shaft bearing housing(s) at the shaft centerline. At this location, typical vibration levels perpendicular to the shaft are < 100 g and the frequency range of interest is < 5000 Hz. A general purpose single axis piezoelectric accelerometer with either a 10 mV/g or 100 mV/g sensitivity fits this criteria.
Other characteristics to consider are size, mounting options, cable connections, grounding, and cost. Several mounting options are available. They include magnetic bases, adhesive bases and stud mounts. The mounting option you choose affects the frequency range of your accelerometer measurements. The table below shows typical frequency limits for accelerometer mounting methods.
| Mount Type | Typical Frequency Limit |
| Magnet | 2,000 Hz |
| Adhesive | 5,000 Hz |
| Stud | 6,000 Hz |
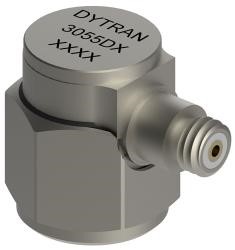
The table below shows some examples of stud mounted general purpose piezoelectric accelerometers. These accelerometers all have a female 10-32 coaxial / microdot connector. It is important to note that this is not a complete list of accelerometers and there are many options available from each manufacturer. I would encourage you to go to the websites linked in the table and see what’s available.
 |
 |
 |
 |
 |
|
| Manufacturer | PCB | Dytran | BRÜEL & KJÆR | Endevco | Kistler |
| Model # | 353B03 | 3055D1 | 4533-B | 256HX -10 | 8702B500-M1 |
| Sensitivity | 10 mV/g | 10 mV/g | 9.8 mV/g | 10 mV/g | 10 mV/g |
| Frequency Range | (±5%) 1 to 7000 Hz | (±5%) 1 to 5000 Hz | (±10%) 0.2 – 12800 Hz | (±10%) 1 to 10000 Hz | (±5%) 1-10000 Hz |
| Temperature Range | -65 to +250 °F | -67 to +250 °F | –67 to +257 °F | -67˚F to +257˚F | -67˚F to +257˚F |
| Height | 0.88 in | 0.64 in | 0.54 in | 0.55 in | 0.67 in |
| Weight | 0.38 oz | 0.35 oz | 0.3 oz | 0.14 oz | 0.32 oz |
| Housing Material | Titanium | Titanium | Titanium | Titanium | Titanium |
| Electrical Connector | 10-32 Coaxial (side) | 10-32 Coaxial (side) | 10–32 Coaxial (side) | 10–32 Coaxial (top) | 10–32 Coaxial (side) |
| Mounting Thread | 10-32 Female | 10-32 Female | 10-32 Female | 10-32 Female | 10-32 Female |
For more information about collecting vibration data, accelerometers, iTestSystem, or test equipment rental, contact Mark Yeager @ (844) 837-8797 x701.
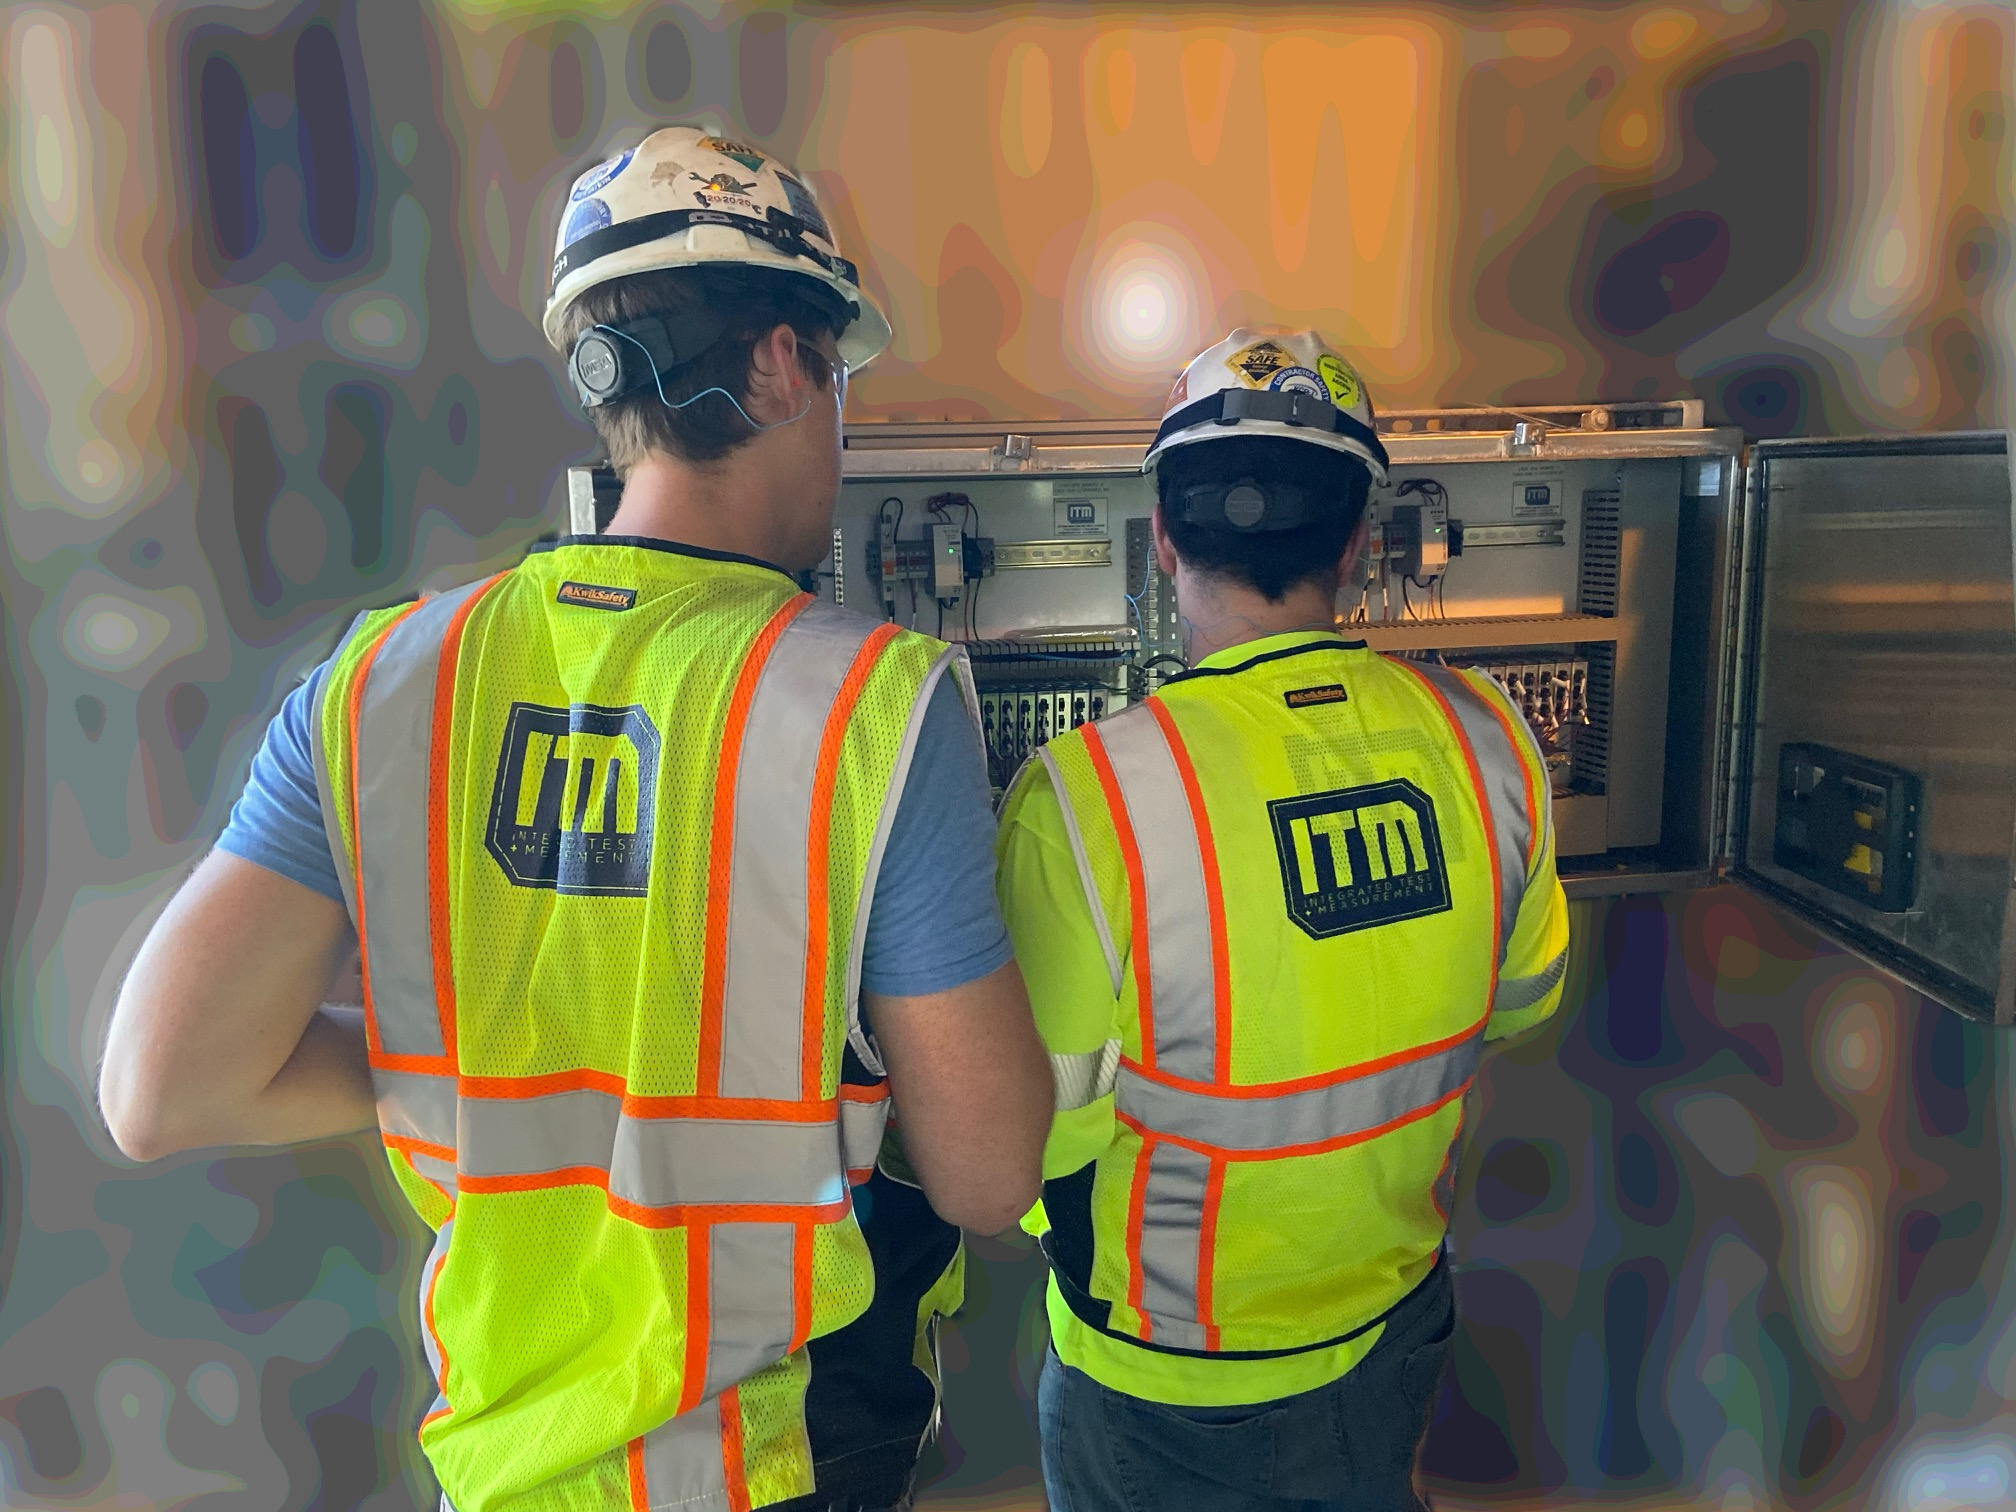
Last week our team successfully and safely installed another Boiler Monitoring System (BMS). This system, a Sootblower Fouling Detection (SFD) system, monitors structural and vibration sensors that quantify the boiler’s response to sootblower operations. The SFD system analyzes the boiler response data and outputs Key Performance Indicators (KPIs) such as fouling level, sootblower efficiency, and sootblower health to automated boiler cleaning systems.
This boiler uses over 50 sootblowers located at different elevations to clean soot build-up from boiler steam tubes. Since the vibration measurement locations are relatively far apart, the SFD system requires a distributed monitoring system consisting of several junction boxes that monitor and process data for groups of sensors. One team of engineers mounted the vibration sensors to the sootblowers and confirmed communication back to a local junction box containing the National Instruments condition monitoring hardware. The other team installed the junction box panels and terminated the sensor cables.
After all the sensor installations and terminations were completed, each sensor’s location and calibration were verified. While the sensor verification was being completed, one engineer worked with the mill IT department and the controls engineer to establish remote connection to the system and confirm communication with the mill’s automated cleaning system.
After commissioning the system and returning to our home base, our engineers are now monitoring the system through a VPN connection and assisting boiler operators with optimizing their cleaning process.
For more information about our ryan.welker@iTestSystem.com or phone @ 1.844.837.8797 x702
ITM | Integrated Test + Measurement
227 Water Street, Suite 300
Milford, OH 45150
Phone: 1.844.TestSys
Fax: 513.248.8453
Email: ITM Sales

ITM provides software development, structural and mechanical testing services, industrial monitoring, strain gauging, and data analysis solutions to clients on six continents. ITM is a recognized National Instruments Gold Alliance Partner.

